Hanging art can be a puzzle. How do you hang art for optimum viewing? There are many questions involving placement on the wall, choosing hardware and hanging wire
What kind of art is a “good investment”?
Art has commonly associated with an investment
Buying art is an emotional purchase and any piece of art you love and connect with is a good investment. It will bring you joy every time you look at it.
How to choose the hardware
Now that you have purchased the art you love, how do you hang it?
screw. 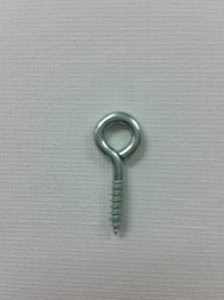 These are the least expensive and can be a good choice for lighter weight, or smaller pieces of art. The drawback to the
The type of hanger that I prefer is the D ring.  D rings are easy to mount, come in various sizes depending on the weight of your art, can be found in most hardware and big
Choosing the picture wire
There are three basic types of picture wire. Plain wire, braided wire 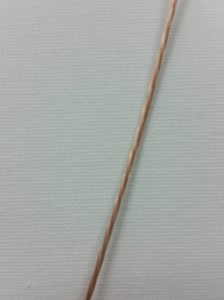 My vote is for the plastic covered braided wire.
How to mount the hardware
You are now ready to mount your hardware. Materials you will need.
Screw driver witha Phillip’s head bit- Drill with a bit smaller than the screw you are using with the hardware
- ruler or tape measure
- Pencil
- picture wire
- Pliers with wire cutter blades
Place the art face down on a stable surface like a counter, table or even the floor. If your art has texture and you are concerned about damage, place it on a rug or towel to protect the frame and face of the art. Make sure you know where the top of the art is before you take the next step, which is to measure from top to bottom of the art. 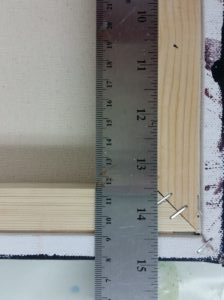
Now measure 1/3 to 1/2 of the way down from the top of the art on each side. 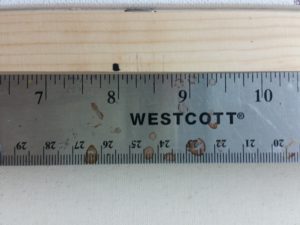 If the art is smaller than 16” x 20” use the 1/2 way down
Measure 1/2 of the way down from the top for pieces smaller than 16” x 20” and 1/3 of the way down for larger pieces. Make a mark. Lay the D ring flat side down
against the frame.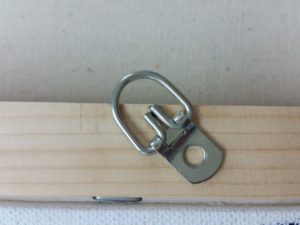 The tab hole should cover the mark at an angle to the frame. The distance from the edge with be determined by the size of the D ring you are using. The proper placement is for the D ring to meet the frame at the edge with the top of the D ring intersecting the frame at an angle. Once you have the D ring placed properly, make a mark through the hole in the shank of the D ring. Drill a hole at the mark you have made
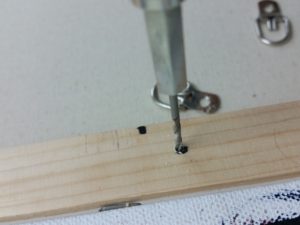 Grab
Grab
Attaching the picture wire
I use a standard measurement of 4” from the top of the frame on my larger pieces and 2″ on all my smaller pieces so all my artwork is standard. This is the measurement used on the wall for hanging. Leave the wire attached to the roll and put the loose end into the hanger on one side of the frame. leaving about 4”. Pull the wire tight against the D ring.  Begin to wrap
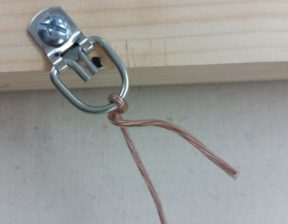
Wrap the 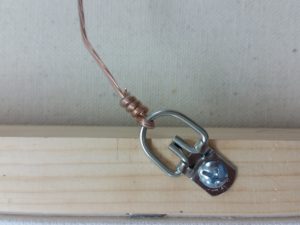
Cut the wire and pinch the end tight with the pliers. Bring the wire up to the top of the frame. 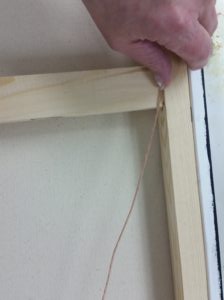 Continue to stretch the wire down to the other D ring and snip off leaving an extra 4”
 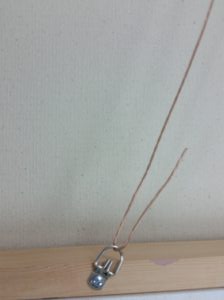 Pull the wire through the D ring, pulling it tight to the desired measurement from the top of the frame. Now wrap the end around the base wire in a spiral
 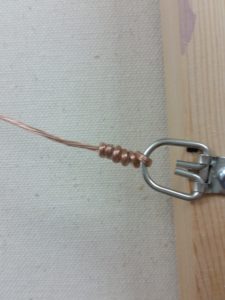 After you have wound a 1” of spiral snip off the end, push tight with the pliers and you are done preparing the painting for hanging
How to Measure the Wall for Hanging Art
To properly view a piece of art, the
- Measure the length of your artwork from top to bottom. Now, divide the measurement in half.
- Next, measure from the top of the wire to the top of the frame and subtract that measurement.
- Take that measurement and add it to the 58” center eye level wall measurement.
This is where the bottom of the hanger goes. Measure the wall at this measurement and mark where the nail goes into the hanger. (i Hammer the nail and hanger into place. Hang your painting and you are done!
Please click on the link to subscribe to my newsletter to get more helpful hints and blog posts.